If you want to learn how to publish a Pinterest Pin in 5 seconds (using my Pinterest System), read this article and watch the below YouTube video!
I’ve been following this system since I started publishing pins on Pinterest. The entire process creates less friction and makes Pinterest publishing much faster and easier!
I’ll show you how you can set up the same Pinterest System on your end so you too can publish pins at blazing-fast speeds!
My Entire Pinterest Marketing System boils down to Three Steps which we’re going to go through using three apps:
Canva, Trello and Pinterest!
Step 1: Create Pins Using Canva
The first part has to be creating Pinterest pins.
You can use any kind of creative app to create hooks. I prefer using Canva as it already has hundreds of pre-made templates, and you can easily add or remove elements from the pin.
Canva gives me too much control over how I want my pin to look and once you get the hang of Canva, creating pins for each post gets way too easy!
If you want a breakdown of how I go about creating Pinterest Pins on Canva, check out this video! I’ll leave a link in the description!
And if you want to start using Canva to explode your creativity, I’ll leave a signup link for Canva in the description! Check it out!
Once you’re ready with your creative Pinterest Pins, I want you to organize your pins. Let’s create a folder for March 2024.
Now inside this, I’ll create 31 subfolders and name them according to dates.
It seems like a lot of work, but it’s not! You create folders for a month and copy-paste them for future months!
Once I’m done with that, I’ll pick 5-7 out of the 12 pins I created and put them in the March folder, the rest get distributed evenly in April and May folders!
Inside March, try evenly spreading out those 7 pins. For example, you can publish this pin every 4 or 5 days!
Step 2: Storing Titles & Descriptions Using Trello
When it comes to publishing pins, I see many people spending a lot of time.
For example, every time someone wants to publish a pin, they find the blog post on their website, take the titles from there, write up a description or steal some lines from the blog post and grab the link from the website!
While this is the right way to do things, it’s so time-consuming as you need to find the blog post every time you need to publish your pins on Pinterest!
That’s why I created this Trello system that works pretty well for me!
So what I do is after I publish a blog post, I open up Trello, then I click on add a “New Card”.
I copy-paste the title of the blog post from my website, grab the URL, paste it into the description of the card and write up a few lines on the topic of that blog post.
You can Pick some lines from the post and add them here. Once that’s done, save the card, and there you go!
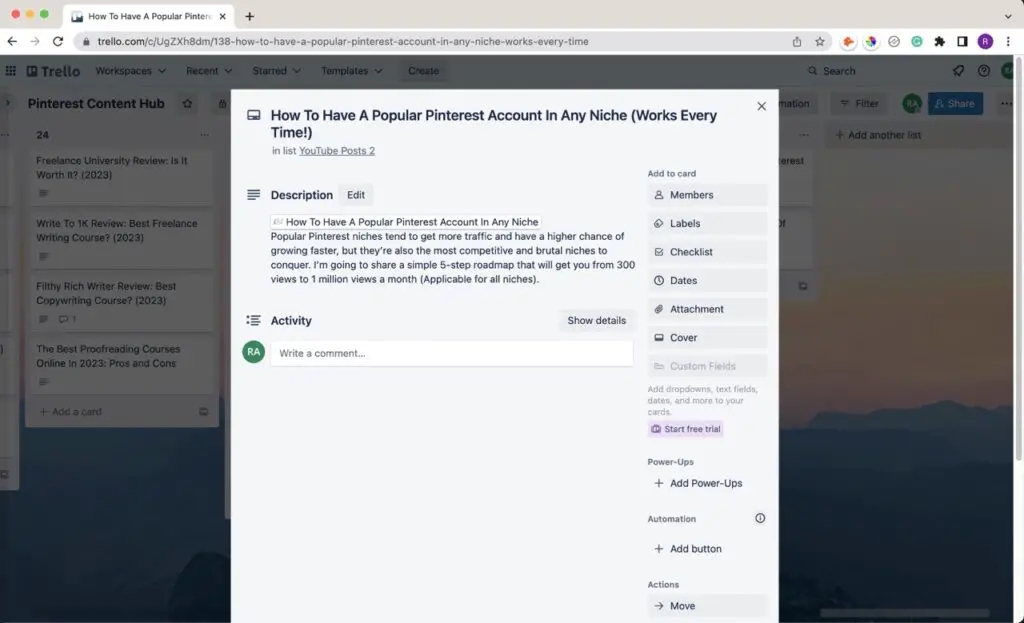
Do this often, and you have a library of blog posts with titles, descriptions, and URLs that can easily be searched with Control/Command + F depending on Windows or Mac users.
What I also do is add additional title ideas in the same card so I can keep changing the titles while publishing these pins!
You can also add keywords and alternate descriptions to test and see what descriptions work best for your Pinterest Pins!
Step 3: Publishing Pins Using Pinterest
Once you have your Trello System set up, it’s time to publish those Pinterest pins in 5 seconds!
Open Trello and your Pinterest Account, I want you to keep these two tabs open on your web browser, that way you can easily switch between the tabs using the keyboard shortcut (Control + Tab) and speed up your publishing!
Then click on upload pin, find the correct folder for the date you want to upload and select the pin. Control + tab (On your keyboard) to reach Trello, and Control/Command + F to search for the blog post for that Pinterest Pin.
In this case, it’ll be Popular, and the card “How to have a popular Pinterest account in any niche is highlighted!
Select the card, copy and paste the title to Pinterest and in the Alt text on your Pinterest account (again use the keyboard shortcut Control + tab to save time!)
Go back to Trello, copy the description, and paste it on Pinterest.
Cut and paste the post URL where they say to add a destination link, schedule the Pinterest pin at a later date, choose a board you think best suits that specific Pinterest Pin, and Click Publish!
Publish Pinterest Pins Fast
If you find scheduling Pinterest pins boring, or you want to save time, you should amp up your speed!
When it comes to publishing pins faster, it boils down to one key thing that took me from a 3.5 to a 9.7! and that’s using keyboard shortcuts!
Keyboard shortcuts like Control + Tab to shift between tabs on Chrome, Control/Command + C, X, V, and F to copy, cut, paste, and Find are very useful when your goal is to publish those pins at blazing speeds!
The Last thing I have for you is to keep practicing publishing pins! The more you publish using the system I explained in this article, the better results you’ll see!
If you liked using Trello and Canva, you should read this article, where I’ve made a list of the top 8 Chrome Extensions for Pinterest Marketers!
Use these extensions to supercharge your productivity!
Check out My Pinterest Account here – Rylan’s Pinterest Profile!
Check out My YouTube Channel here – Rylan’s YouTube Channel!